Getting started
Set up the first verifiable inventory record
Create the smallest real workspace foundation and prove that the first quantity can be followed back to its source.
Step by step
- Open Settings > Regional settings
These are editable workspace suggestions. Detected from this device. You can change every regional value later. Before recording live work, open Settings > Regional settings and confirm that it is configured. Review the country, workspace language, locale, time zone, base currency, number formats, measurement system and paper size. These values shape presentation and confirmed document snapshots; they do not alter the meaning of inventory movements. In Overview, “Set up KnownStock at your own pace” shows your workspace’s progress and highlights “Your next step”. Choose “Continue setup” to open that screen. “Hide guide” leaves the workspace available; “Open setup guide” brings it back. During the trial, the banner shows the remaining days and end date, with a direct link to “Choose plan and billing cycle”. You can continue using the app without completing the guide first.
- Choose the base unit
Open Opening stock and expand Quick catalogue setup. Choose one of the standard units already available—uni, m, m2, m3, kg or l—or create another only when the item is genuinely controlled in a different unit. Check its decimal precision before use.
- Create a meaningful category
In the same quick setup, create at least one operational category before the first item. The protected internal fallback is not a completed catalogue category and does not count in the setup guide.
- Create one real item
Use a stable SKU and a name the team recognises. Choose the meaningful category and base unit carefully. Presentations, barcodes and optional weight can be added after the basic record is useful.
- Create the first warehouse
Add the real operational stock place. Use optional locations only when the team needs to distinguish shelves, zones, vehicles or another practical subarea.
- Prepare the opening quantity
Choose the item, warehouse and optional location. Enter the physically verified quantity and the known unit cost. If cost is genuinely unknown, leave it unknown rather than entering zero.
- Review before confirmation
Save the opening record as a draft. Check item, place, quantity, cost and reason. A draft has no inventory effect and can be corrected before confirmation.
- Confirm online and trace the result
Confirm once while online. Open Inventory, then the item detail, and verify that the position and movement history point back to the opening document and its place in the confirmed history.
Getting started
Run the daily prepare–review–confirm flow
Use drafts for preparation, confirmation for deliberate effects and history for the next decision.
Step by step
- Begin with the operational question
Start in Overview and Inventory. Decide whether the work concerns physical stock, commitment, allocation, incoming supply, a count difference or a dispatch task before choosing a document.
- Open the matching workspace
Use Purchases, Sales, Stock operations, Counts, Replenishment, Production or Shipping. Do not choose a document merely because its wording feels familiar; use the flow whose effect matches reality.
- Prepare the complete draft
Record the parties, warehouse, dates, lines, quantities and reason that another user needs to review. Offline-capable flows may retain a workspace-bound draft on the device.
- Review the effect and exceptions
Check what will change physically and what will change only in planning. Resolve overages, negative-stock warnings, missing cost, count conflicts or permission requirements before proceeding.
- Confirm once while connected
Confirmation requires an online response. KnownStock recognises a retry of the same request and prevents it from being applied twice, but the operator still reviews the intended effect before submitting.
- Read the resulting state
Use the confirmed reference, status and latest activity included to see what changed and what remains pending. Partial work should leave a visible remainder rather than appearing complete.
- Correct with a new controlled action
Reopen confirmed work for reading. Use a linked return, eligible reversal, count adjustment, state change or explained regularisation instead of rewriting the confirmed record.
Catalogue and codes
Create items, units and fixed presentations
Model each item around one base stock unit, then add the packs the business actually buys, stores or sells.
Step by step
- Choose the stock unit
Select the unit in which quantity is ultimately controlled. The standard units uni, m, m2, m3, kg and l are available from the start; create another only when the operation genuinely needs it. One item has one base stock unit; packs and cases are fixed presentations of that unit, not separate current balances.
- Set practical precision
Use whole units for indivisible pieces and decimal precision only where the product definition supports a measured quantity. Do not use KnownStock for variable-weight stock or unsupported measurement variants.
- Create a stable item identity
Enter the SKU, operational name, type and useful description. Keep codes stable because confirmed documents and exports use them to help people identify the same record.
- Add presentations selectively
Create a pack, box or case only when its conversion to the base unit is fixed. Record its label, exact factor and optional gross weight.
- Review conversion with a real example
If one case contains 12 pieces, test that 5 cases represent exactly 60 base pieces. Correct the catalogue before using the presentation in a live draft.
- Preserve historical meaning
A confirmed document keeps the presentation description and factor used at that time. Changing a catalogue presentation later must not reinterpret an earlier movement.
Catalogue and codes
Add barcodes or preview a create-only item import
Resolve every code to one catalogue target and keep bulk creation reviewable before any row is applied.
Step by step
- Search before creating
Check the item and code already in the workspace. A normalised barcode or internal code cannot point to two different items, presentations or locations.
- Choose the exact target
Attach an item-level code to the base item or a presentation code to the fixed pack it identifies. A location code belongs to the location, not to an item line.
- Preserve meaningful characters
Keep leading zeros and letters. Do not convert identifiers through a numeric spreadsheet column that may alter their text.
- Test the resolution
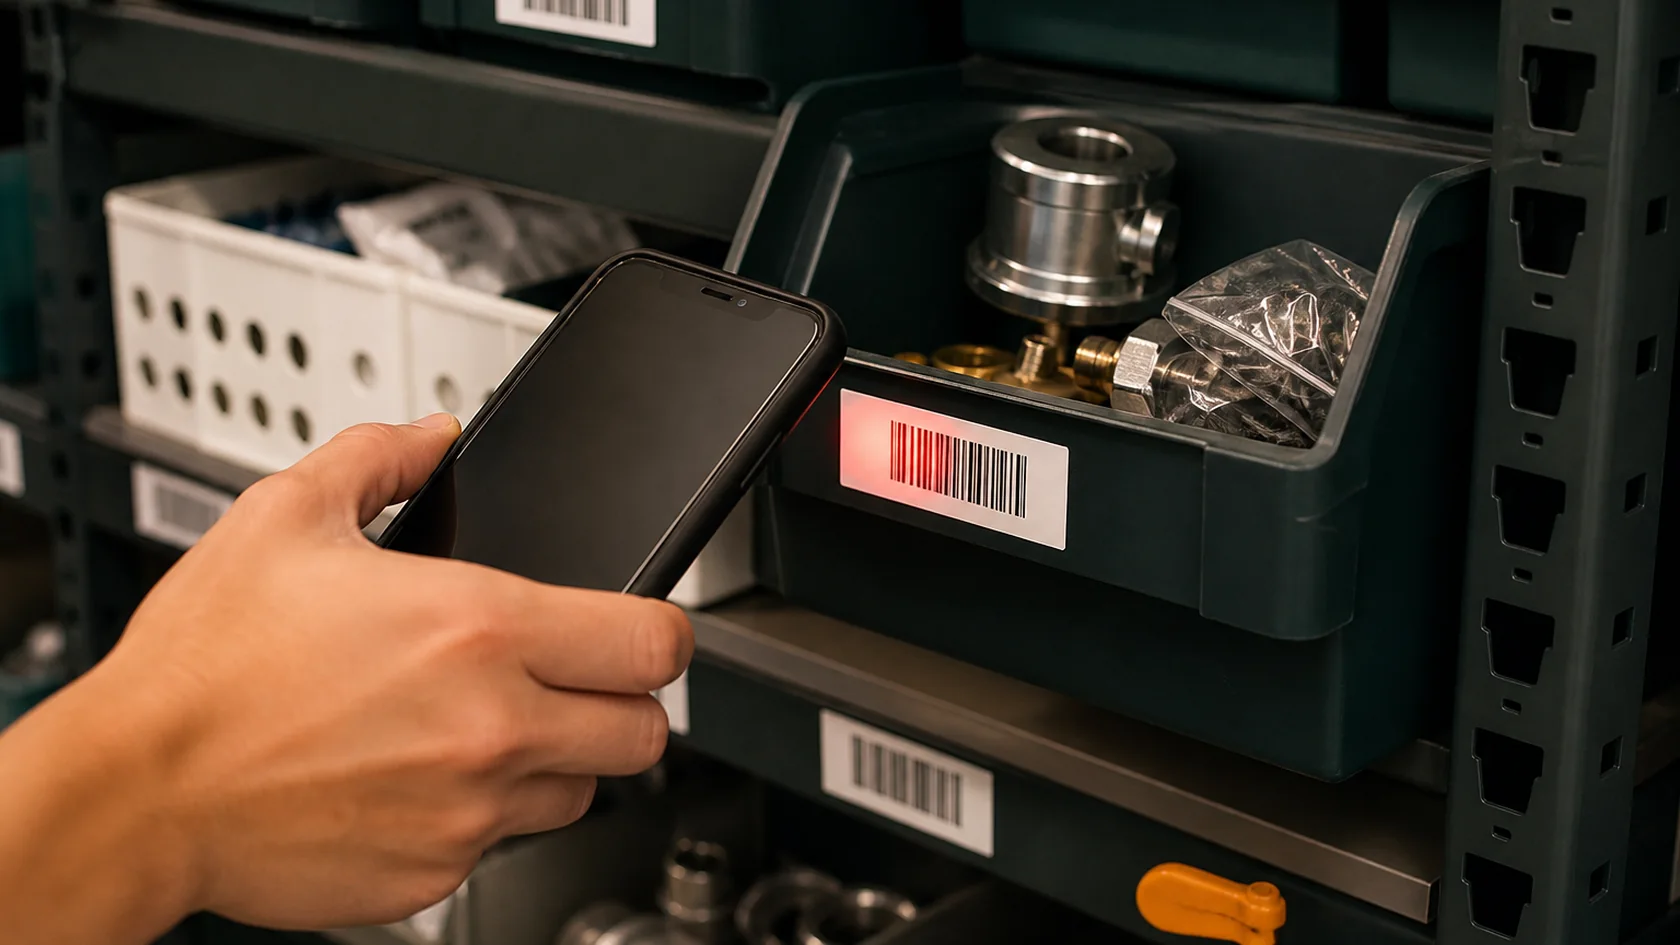
In a stock count, start the camera and scan continuously. KnownStock prefers the browser’s native detector and falls back to its bundled decoder, debounces the same code, adds one unit per accepted read, and keeps the camera active. Check the item, presentation and location, use sound or vibration as needed, and use Undo last scan to post the exact compensating observation. A scan only records count evidence; it never confirms or adjusts inventory by itself.
- Download the import template
For multiple new items, use the public UTF-8 template. Keep exactly these headers: sku, name, description, category_code, item_type_id, base_unit_code, gross_weight_kg and barcode. Remove its example row before entering live catalogue data.
- Preview and correct every row
Upload the file to Import CSV. Review duplicate SKUs or barcodes, missing categories or units, invalid item types and invalid weights. This import does not create presentations, and existing items are not silently updated.
- Apply the reviewed preview
Apply the valid preview in one create-only operation. If any required row cannot be created, KnownStock leaves the catalogue unchanged instead of applying only part of the file.
Catalogue and codes
Set up warehouses, locations and physical states
Describe where inventory is held and whether it is usable, quarantined or blocked without introducing advanced WMS complexity.
Step by step
- Identify the operational stock places
Create a warehouse for every place whose inventory must be controlled separately, including a vehicle when the business treats its carried stock as a distinct responsibility.
- Use recognisable codes
Choose short stable warehouse and location codes that operators can read on labels, drafts and reports. Avoid reusing a retired code for another physical place.
- Enable locations only where useful
Use optional locations for shelves, rooms, vans or zones when that detail helps receiving, picking, transfers or counts. A small stockroom may work well with only its default operational location.
- Assign member scope
Administrators see all warehouses. Assign each User to one, several or all warehouses and check that both reads and commands stay inside that authenticated scope.
- Keep condition separate from place
Usable, quarantine and blocked are physical states. Move stock between states with a reclassification; do not create a fake warehouse solely to represent damage or inspection status.
- Test the structure with one item
Open Inventory and filter by item, warehouse and location. Confirm that the resulting position answers where the quantity is and which part is usable.
Purchasing and sales
Order, receive, invoice and return purchased stock
Keep expected supply, physical arrival and documentary follow-up distinct so the same goods are never added twice.
Step by step
- Prepare the supplier and order
Create or select the supplier, choose the warehouse and enter item lines, requested quantities, presentations, expected date and optional operational prices.
- Confirm the purchase order
Review and confirm the order to create expected incoming supply. This is a planning effect only; no physical quantity has arrived yet.
- Create the receipt from the order
When goods arrive, create a linked receipt for the quantity physically observed. Keep damaged, missing or excess quantities visible instead of copying the full order by habit.
- Review costs and exceptions
Check item, presentation, warehouse, location, quantity and known cost. An authorised overage or negative consequence requires the explicit reason and permission shown by the workflow.
- Confirm the receipt
Confirmation adds the received physical quantity and reduces the linked pending incoming amount. A partial receipt leaves the remaining order quantity open.
- Record the operational invoice correctly
Create a direct purchase invoice only when it is the physical input document. An invoice derived from a confirmed receipt is documentary and must not add the same stock again.
- Use a supplier return for real outbound goods
Create and confirm the linked supplier return when stock physically leaves for the supplier. Preserve the item, quantity, source and reason.
Purchasing and sales
Commit, allocate, deliver and return sales stock
Separate customer demand, reservation and physical delivery so availability remains meaningful throughout partial fulfilment.
Step by step
- Prepare the customer order
Select the customer, warehouse and item lines. Record requested quantities, dates and optional operational prices without presenting the document as a fiscal invoice.
- Confirm commitment
Confirm the sales order to create committed demand. Commitment reduces available-to-promise but does not remove physical on-hand stock.
- Allocate when the source matters
Reserve usable stock from the permitted warehouse and location. Allocation sits inside commitment; it must not be subtracted a second time when calculating availability.
- Prepare a partial or complete delivery
Create the linked delivery for the quantity that will genuinely leave. Review the served quantity against the remaining commitment and allocation.
- Confirm physical handover
Delivery confirmation removes the physical quantity and reduces the linked commitment and allocation served by that delivery. The unserved remainder remains visible.
- Avoid a second outbound effect
An invoice derived from a confirmed delivery is documentary. A direct operational invoice may carry the outbound effect only when no delivery already recorded it.
- Record a customer return when goods arrive back
Use the linked return for the physically received quantity and place it in the correct warehouse, location and state after inspection.
Stock movement
Ship, receive and resolve a warehouse transfer
Keep origin, transit and destination visible through a two-phase movement, including partial receipt and discrepancies.
Step by step
- Choose the appropriate transfer
Use a planned two-phase transfer for dispatch and later receipt. Use an immediate internal move only when the origin and destination changes are controlled in one act.
- Prepare origin and destination
Select permitted warehouses, optional locations and item lines. Confirm that the destination differs from the origin and that the quantities match the intended movement.
- Confirm the transfer plan
The plan records expected movement and operational responsibility. It does not remove stock from the origin before shipment.
- Ship the observed quantity
Record what actually leaves the origin. Shipment removes that quantity from origin and places it in transit while preserving company total quantity and value.
- Receive what actually arrives
At the destination, record the observed quantity and correct location or state. Partial receipt reduces transit only by the amount received and leaves the remainder visible.
- Investigate a discrepancy
Compare confirmed shipment, packaging, handover and destination evidence. Do not erase the transit remainder merely to make the transfer look complete.
- Resolve the remaining transit
Receive it later, return it to origin or record an authorised transit loss with a reason and evidence. Each path creates the appropriate immutable inventory facts.
Counts and correction
Prepare, capture and approve a controlled stock count
Observe physical quantities at a declared inventory point, review later movement and post only authorised net differences.
Step by step
- Define the count scope
Choose the warehouse and whether the count covers the whole warehouse, one item, one location or an item-location combination. Narrow scope makes responsibility and review clearer.
- Choose blind or visible capture
Use blind mode when operators should not see the expected quantity. Use visible mode when the operating method deliberately allows it.
- Decide whether to freeze overlap
Apply an expiring scope freeze when movements would make the observation unreliable. Coordinate warehouse work before opening the session.
- Open the session
Opening records the confirmed point used for comparison. The draft itself has no stock effect; the open session defines when the observation is anchored.
- Capture observations
Enter or scan the item and use Set total or Add scan as appropriate. Blank means not observed; zero is a deliberate observation. Correct double scans before review.
- Review conflicts and later movements
Compare expected-at-opening, observed quantity and movement after opening. Recount ambiguous lines instead of approving a difference that may be caused by timing.
- Apply required separation of duties
If policy or the configured threshold requires another person, request the second authorisation. The creator cannot bypass that control by changing the client.
- Approve the net differences
Approval posts only the authorised difference and releases the scope freeze in the same controlled action. The observations and review history remain visible.
Counts and correction
Correct damage, quarantine, gains and errors without rewriting history
Choose the operation that describes what happened and preserve both the original fact and the correction.
Step by step
- Identify the real situation
Decide whether stock is still physically present, changed condition, returned from a customer, returned to a supplier, was observed in a count or was posted by mistake.
- Change state when ownership remains
Move usable stock to quarantine or blocked when it is still present but should not be promised. This preserves on-hand quantity while changing usable quantity.
- Use a count difference for an observation
When a controlled count found the discrepancy, review and approve the session so the difference remains connected to its scope and opening point.
- Use an explained adjustment for another gain or loss
Record the known delta, warehouse, location, state and reason. Obtain the required authorisation for negative stock or policy exceptions.
- Use linked returns for real goods
A customer or supplier return describes a physical inbound or outbound movement connected to its commercial source better than a generic adjustment.
- Reverse only when eligible
Create the authorised inverse of an erroneous confirmed operation when later dependent facts do not make exact reversal unsafe. If reversal is rejected, use the correction that matches current reality.
- Verify quantity and value afterward
Open the position and movement history. Confirm that physical quantity, state and operational value tell the same story after the corrective entry.
Planning and assembly
Review and convert an explainable replenishment suggestion
Turn transparent minimum-and-target logic into a purchase, transfer or production draft without silently ordering anything.
Step by step
- Create the policy
Select the warehouse and item, then set minimum, target, preferred presentation, source preference and useful lead-time context.
- Read the quantities in order
Review usable, committed and confirmed incoming supply. Projected quantity is calculated from those meanings; allocated is already within commitment and is not subtracted twice.
- Understand why the candidate appears
A candidate becomes actionable when projected quantity is at or below minimum. The raw need is target minus projected quantity.
- Review presentation rounding
If a preferred case or pack applies, KnownStock rounds the suggestion upward to that fixed conversion. Confirm that the rounded result is operationally sensible.
- Choose the source consciously
Select purchase, transfer or light production according to the real source. Review supplier, origin warehouse or active recipe before conversion.
- Dismiss or postpone with a reason
When no action is needed now, record the decision instead of changing the minimum merely to clear the list.
- Convert to a draft
Conversion creates the appropriate draft and links it to the recommendation context. It never confirms a purchase order, transfer or production order automatically.
Planning and assembly
Plan and record a simple one-level production run
Commit expected components and result, then post actual consumption and output together for each partial run.
Step by step
- Create the recipe
Choose the result item and exact component quantities. Add fixed presentations where useful and review the quantities in base units.
- Activate a reviewed version
Only an active recipe version can support new planning. A later recipe change creates a new version and does not rewrite confirmed production history.
- Prepare the production order
Select the recipe, planned result quantity, consumption location, result location, date and notes. Saving creates a draft with no effect.
- Confirm the plan
Confirmation creates component commitment and expected production result. Physical components have not yet been consumed and finished stock has not yet been received.
- Check material availability
Review required, committed, allocated and usable component quantities before execution. Resolve shortages or an authorised exception explicitly.
- Record the actual run
Enter actual usable output, quarantine output, rejected quantity and actual component consumption. One confirmation removes the components and receives the physical result together.
- Continue or close the remainder
Partial runs leave the outstanding plan visible. Record further runs or close the remaining quantity with the required reason when production will not continue.
Dispatch and reporting
Prepare packages, weight, tracking and handover
Organise delivery quantities into shipments without creating a second inventory movement after delivery confirmation.
Step by step
- Start from the sales delivery
Prepare the served quantities first. Shipping organises those quantities for handover; it does not decide what the customer order should serve.
- Create the shipment or direct handover
Choose the carrier or manual handover route and assign each served quantity to exactly one shipment context.
- Prepare packages
Add package references and distribute shipment lines. Keep the total assigned quantity equal to the quantity intended for this handover.
- Review theoretical weight
KnownStock uses the frozen gross weight of the assigned items or presentations. If a required weight is unknown, the total is marked incomplete instead of treating the missing value as zero.
- Record actual weight when observed
Enter the measured package or shipment weight separately. Actual weight does not overwrite the catalogue value used as theoretical context.
- Confirm the delivery once
Delivery confirmation creates the single outbound inventory effect and hands over the prepared shipment context. Editing carrier or tracking details later does not move inventory again.
- Maintain tracking and incidents
Record service, external reference, tracking URL, estimated or actual handover information and operational incidents manually as they become known.
Dispatch and reporting
Read on-hand, usable, committed, allocated, incoming and available
Use each quantity for its own question and keep the confirmed reporting point visible.
Step by step
- Choose the physical scope
Filter the item by warehouse, location and physical state. On hand answers what is physically present inside that scope.
- Read usable separately
Usable excludes physical quantity held in quarantine or blocked state. A state change can reduce usable without changing total on hand.
- Read commitment as demand
Committed comes from confirmed sales demand not yet fully served. It is a planning quantity, not a second physical pile.
- Read allocation as reservation
Allocated identifies the usable quantity reserved inside commitment. It supports picking and fulfilment decisions but does not remove stock.
- Read incoming by source
Confirmed purchase orders, shipped transfers and confirmed production plans create different incoming contexts. Keep the source visible when timing or responsibility matters.
- Use available for the next promise
Available-to-promise is usable minus commitment. Do not subtract allocation again, because allocation is already part of committed demand.
- Keep the confirmed point
Positions and reports state the latest confirmed inventory activity included. Compare results only when their scope and confirmed point are understood.
Dispatch and reporting
Run, inspect and export an operational report
Choose a report whose scope matches the decision, retain its confirmed reporting point and export only with permission.
Step by step
- Choose the decision first
Decide whether you need a current position, movement history, pending quantity, valuation, count review or dispatch view before selecting the report.
- Set the scope
Apply the item, warehouse, location, date, state or status filters needed for the question. Avoid exporting a whole workspace when a narrow report is sufficient.
- Run the report
KnownStock calculates the complete result from confirmed facts and displays the latest inventory activity included. Wait for that complete result rather than combining values from separate screens.
- Review incomplete information
Unknown cost, incomplete weight, remaining transit or unresolved count work should be visible as such. Do not convert an unknown value to zero for presentation.
- Export CSV when analysis is needed
Authorised users can download safe UTF-8 CSV. Formula-like text is neutralised to reduce spreadsheet execution risk; inspect types and leading zeros after opening it.
- Export PDF for a stable view
Generate the versioned local PDF using the workspace paper and regional presentation. Review pagination, filters, the confirmed reporting point and sensitive columns before sharing.
- Keep the operational boundary
Use the result for inventory control and handoff. It is not a statutory valuation, accounting record, tax document or compliance certificate.
Workspace administration
Add members and apply warehouse scope
Give every person an individual identity, a simple profile and only the warehouse access needed for their work.
Step by step
- Choose the visible profile
Use Administrator for full functional and configuration access. Use User for ordinary warehouse work with an assigned scope and optional advanced permissions.
- Create the member
Enter the person’s real name, required email address, profile and warehouse assignments. Every person must verify their email before access is enabled. Do not create a shared or generic operator account.
- Review advanced permissions
For a User, first assign only the warehouses needed for the job. Enable read-only when the person must inspect but never mutate data, and enable only the advanced exceptions required: master maintenance, cost visibility, count approval, negative-stock authorisation, reversal, revaluation or export. Hidden controls are backed by the same server-side denial, so a crafted request cannot widen access.
- Send the activation email
KnownStock sends a private, single-use link directly to the person’s email. Following it verifies that address and lets the person choose their password. The administrator cannot copy the link or set the password.
- Monitor pending capacity
Active and pending memberships both occupy a plan place. An expired activation credential does not free the place automatically.
- Reissue or cancel deliberately
Reissue an expired credential to invalidate the earlier one, or cancel the pending membership when the person should no longer join.
- Disable or transfer responsibility
Disable access promptly when somebody leaves. The Owner cannot be disabled or demoted until ownership has been transferred safely to another active Administrator.
Workspace administration
Work safely on mobile and through a connection loss
Use the installable app for capture and drafts while keeping confirmation, workspace identity and sensitive session data controlled.
Step by step
- Install from the KnownStock app
Use the browser installation prompt at https://knownstock.com/app/. This installs the signed-in application, not the public website.
- Check the signed-in workspace
Before capture, confirm the workspace badge and your permitted warehouse. Your secure session determines the workspace automatically; there is no manual workspace code to enter.
- Prepare a local draft
Supported flows may retain their draft and retry context on the device, bound to the current authenticated workspace. Save enough context to resume after a reload.
- Respond to the offline banner
When offline, treat displayed read data as potentially stale. Continue only with supported capture or draft work and do not assume another person’s recent confirmation is visible.
- Reconnect before confirmation
Inventory confirmation, count opening or approval and other final actions require an online response. Review the draft again after connectivity returns.
- Handle a retry safely
If a confirmation response was interrupted, retry the same action rather than recreating the document. KnownStock recognises the repeated request and prevents it from being applied twice.
- Log out on a shared device
Logging out revokes the session and clears saved workflow context. Passwords and session cookies are never stored by application JavaScript.
Workspace administration
Review regional and inventory control settings
Set presentation and operating policies consciously before they shape documents, approvals and exceptions.
Step by step
- Complete the workspace regional settings
In Settings > Regional settings, an Administrator reviews country, workspace language, locale, IANA time zone and date/time format. Country defaults are editable suggestions and are never saved until reviewed.
- Review currency, numbers and documents
Check base currency, symbol position, separators, visible decimal precision, metric or imperial measures and A4 or Letter in the live preview. The base currency becomes fixed after the first confirmed document; presentation fields can still change without rewriting earlier documents.
- Choose the negative-stock policy
In Settings > Inventory policies, select whether negative stock is blocked, warned or allowed only through authorised exceptions. Explain the operational reason before allowing a command outside normal availability.
- Set the count approval threshold
For Stock counts, use the same Inventory policies section to define when a difference requires a second person. Keep the threshold aligned with the organisation’s real separation-of-duties practice.
- Set personal display preferences
In Settings > My preferences, each person may inherit or override interface language, visual locale and display time zone. These choices do not change operational dates, calculations or confirmed document snapshots.
- Review team access
In Settings > Team & permissions, an Administrator checks profiles, advanced permissions and warehouse scope after a policy change. A visible control is not security by itself; the server-enforced access must still match each person’s work.
- Test and communicate the decision
Prepare a safe draft or test report and inspect dates, decimals, currency, paper and exception wording. If a workspace policy changed, tell affected users what changed and which procedure to follow.
Access and continuity
Review the trial, choose a plan and understand read-only access
Manage commercial access without letting a subscription change alter or delete operational history.
Step by step
- Review the complete trial
The 21-day trial uses Team 3, the smallest plan, with every version 1 feature and up to 3 active or pending members. Registering a workspace does not create a Paddle customer, checkout or subscription, and no payment card is required.
- Choose by member capacity
Open Plan & access. Plan & limits shows your current access, trial or paid-period dates, remaining trial days and occupied member places. Compare Team 3, Team 5 and Team 10: every plan includes the same functions and differs only by its active-or-pending member limit. Items, warehouses, locations, documents and movements have no separate commercial quota.
- Choose monthly or yearly
Choose “Monthly” or “Annual · 2 months free” above the cards. Annual pricing equals ten monthly payments and is charged once a year. Choose “Choose Team 3”, “Choose Team 5” or “Choose Team 10” to open Paddle’s secure checkout. With an existing subscription, “Switch to…” opens a financial preview before “Confirm change”. Review the final amount and applicable taxes before confirming. A pending payment can be resumed from its plan card; use “Refresh payment status” or “Cancel pending checkout” below the cards when needed. The six base prices are shown without decimal places: 39 €, 69 € and 119 € per month; 390 €, 690 € and 1,190 € per year. Thousands separators follow the regional settings, and the euro symbol follows the amount. Taxes and payment adjustments retain any required decimal places.
- Wait for verified rights
Paddle acts as Merchant of Record and sends the signed event. KnownStock changes effective access only after the server verifies and reconciles that event.
- Use the customer portal
Use “Manage in Paddle” for payment methods, payment documents and subscription cancellation. This button appears when a Paddle customer is linked to the workspace and remains accessible to the Owner in read-only mode. Do not send card details to KnownStock support.
- Understand payment grace
When Paddle first reports past due, the workspace receives the approved seven-day grace period. The banner shows the effective state while the Owner resolves payment.
- Work with read-only continuity
After trial expiry or an ended grace period, mutation is blocked by the API. Search, reading, reports and authorised exports remain available; data is not automatically deleted.
- Restore or change capacity safely
Reactivation restores normal access after verified entitlement. A downgrade requires the Owner to reduce active or pending members first; KnownStock never deactivates people automatically.
Access and continuity
Recover access, export safely and ask for support
Protect credentials, collect useful diagnostic context and keep account recovery, cancellation and deletion as separate actions.
Step by step
- Recover a forgotten password
Owners and invited members recover access through a private link under /app/. It expires 30 minutes after it is issued and can only be used once. Requesting or opening it does not change the password or close sessions. After confirming the new password, previous sessions and pending recovery links for that user are invalidated. No session is created automatically: sign in again with the new password. The other users keep their passwords, roles and permissions.
- Choose a new private password
At least 10 characters with upper and lower case, a number and a symbol. !@#$%_-+=? Set the password from the secure link. Successful recovery signs out other sessions so an earlier device or credential cannot remain active.
- Treat activation and recovery links as credentials
Do not forward, publish or paste a readable token into a support message. Discard it after use or expiry.
- Collect safe support context
Record the workspace name, your user identifier, the document or item reference, the action, the approximate time, the message shown and the smallest reproducible sequence.
- Remove secrets and unnecessary data
Do not send passwords, session cookies, activation links, recovery tokens, card details, private exports or customer information that is not required to understand the issue.
- Export before a major account decision
When authorised, download the relevant reports or workspace export and verify that the files open. Export remains available during read-only continuity.
- Keep commercial actions separate
Cancelling a Paddle subscription ends future commercial access according to its schedule; it is not an immediate workspace deletion request.
- Request deletion as the Owner
Open Settings → My preferences and security → Delete account and data. Type DELETE exactly and choose Request account deletion. This is also available in a read-only workspace. Administrators and Users who are not the Owner cannot request it. Check the Owner’s inbox and spam folder. The link expires in 24 hours. Opening it only displays the confirmation page. Check the workspace reference and Owner’s email, read the warning and choose Delete account and data. Ignore the email if you did not request deletion.
Workspace administration
Delete account and data
Request permanent deletion of the account and all workspace data, including every team member, item, inventory movement and document. KnownStock emails a confirmation link to the Owner. This action cannot be undone after confirmation.
Step by step
- Export what you need
Download and check any reports or workspace export you need before proceeding.
- Cancel the paid subscription
Before deleting this account, cancel the active subscription from Plan & access. Wait until Paddle confirms cancellation and the paid period has ended. A scheduled cancellation alone does not allow deletion.
- Request deletion as the Owner
Open Settings → My preferences and security → Delete account and data. Type DELETE exactly and choose Request account deletion. This is also available in a read-only workspace. Administrators and Users who are not the Owner cannot request it.
- Open the private email link
Check the Owner’s inbox and spam folder. The link expires in 24 hours. Opening it only displays the confirmation page.
- Confirm the correct workspace
Check the workspace reference and Owner’s email, read the warning and choose Delete account and data. Ignore the email if you did not request deletion.
- Check the result
The completion page confirms deletion. All workspace users lose access; the account, records, documents and active sessions are removed. The link cannot be reused.
No procedure matches that search.
Try the name of a record, an action or the problem you are trying to solve.